Sh*t my brain says and forgets about

Tag: tips Page 1 of 2

US Postal Service Scans & E-mails Your Incoming Mail Pieces

The United States Postal Service started a new service in April called “Informed Delivery” which promises to e-mail you images of the envelopes of today’s mail being delivered. You’ll know what important mail is waiting for you in your mailbox even if you’re not at home. You’ll also know if mail isn’t getting delivered to you properly and you can report it to the Post Office with a couple clicks.

InformedDelivery

I normally work at home. During the summer my husband and I also tend to work 2-3 days a week at our seasonal campground site a couple hours away. We put our mail on hold during those days to prevent a mailbox full of potential goodies to steal. Informed Delivery allows us to see the outside of any incoming mail, even during a mail hold. If something concerning comes in we may be able to respond by contacting the sender and finding out what’s in that envelope.

Our mail carrier is fantastic. She works five days a week and on the sixth day when someone fills in for her, our mail service is questionable. On more than one occasion our mail has been mis-delivered to a similarly numbered house a quarter mile away. The only times we had proof of this mis-delivery was when the item had a tracking number associated with it and we sort of knew the item was coming. I ended up friending the person at that address on Facebook so we could communicate when we received each other’s mail. With Informed Delivery I’ll know when I should be expecting a piece of mail and if it’s not in the mailbox, it could be in his.

Informed Delivery isn’t available in every area and I believe it’s considered a beta-testing program. See if it’s available in your area!

https://informeddelivery.usps.com

Preventing Spam iCloud Calendar Invites

IMG_1224.PNG

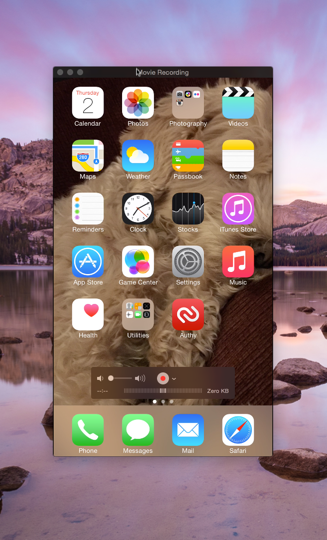
I woke up this morning seeing two notifications of calendar appointments I just couldn’t miss. [sarcasm]

IMG_1225.PNG

Annoying, right? Here’s the best part. No matter what I do – Accept, Maybe, Decline – the sender of the spam appointment receives the notification of my action. There’s no way to just simply delete the damn invitation from your calendar without sending the reply! Well I guess that means 章兴言 & 历昭 are going to get a sad decline from me.

How do I prevent this from happening in the future? How the hell did it happen? Turns out it’s Apple again – thinking they know better for how you want to use e-mail and calendars. Thankfully there is an option to prevent the forced invites.

The Answer Lies in iCloud.com

These calendar invites aren’t coming from some magic hacked portal in your phone. The invites are coming as e-mails into your iCloud.com e-mail account and then being automatically converted into in-app push notifications to both iOS and macOS. Once that’s done the original e-mail is deleted. Gone. Poof. Magical, yet stabby.

Let’s turn off this magical conversion so we have the ability to spam the incoming e-mails and never have them hit your calendar.

  1. First, open iCloud.com up in a web browser.
  2. Log into using the account you use on your phone (where your calendars are stored).
  3. Click on Calendar.
  4. Click on the settings gear 2016-11-25_08-50-07.png in the lower left of the screen.
  5. Click on Preferences.
  6. Click the Advanced tab.
  7. Under Invitations set the option for Receive event notifications as to the second option, as an Email to rather than an in-app notification.
    2016-11-25_08-39-11

Going forward then all of the invites you receive to your iCloud e-mail account will be received as e-mails.

Damn you, spammers!

~A

[update]

Deleting Spam Invites Without Sending Notifications

Taken from the Apple Discussion Forums, here’s a workaround to delete invites without sending the response to the spammer using macOS:

  1. Create a new iCloud calendar (not “On My Mac”).
  2. Move the spam event to the new iCloud calendar.
  3. Delete the new iCloud calendar.
  4. Calendar will now prompt you with “Delete and Don’t Notify” and “Delete and Notify”.
  5. Select “Delete and Don’t Notify”.

Original post: https://discussions.apple.com/thread/3705591?tstart=0

Summarizing Text in macOS

There’s a cool service in macOS called “Summarization” that takes a block of text and figures out the most important sentences or paragraphs in it. I’ve used this service before to help reduce the amount to read on longer posts and conversations. It is definitely not perfect but it can help provide some clarity where our TL;DR brains need it.

Verbosity.png

In this example screenshot you can see I’m looking at a Wikipedia article. The summarize service gives you the option to summarize by paragraph or by sentence. There is a slider to indicate how much detail you want to retain. While less seems better, I’ve found the algorithm loses accuracy roughly around 40%.

Summarize Animation.gif

Using the Summarize Service

It’s really easy to use the service. First you have to turn it on.

System Preferences.png

  1. Open System Preferences.
  2. Click on Keyboard.
  3. Select the Shortcuts tab and then select Services.
  4. Scroll down to Text and check the Summarize service.

Now find text in any app, right click it and choose Summarize from the list of services.

Summarize Clicks.png

Enjoy!

I am a procrastinator.

I have always believed I was a procrastinator. I tend to put difficult tasks off until when they are due. I always believed it was the pressure of the deadline that forced me to complete the task. College gave me a series of structured deadlines to learn new things. Procrastination can also add undue stress onto your system. Over time it will make you feel like you’re stupid and can’t get anything done. ADHD and procrastination seem to go hand in hand as well.

I’m sort of done with procrastination. It sucks and I know I’m smarter than this.

This month I’m speaking at two conferences and giving two different talks. The first is on remote working (a “soft” topic) and the other on an introduction to RxSwift – a fairly complex programming topic. I’ve known I needed to prepare these talks for several months and I have been doing the work. The remote working talk went off well. The RxSwift talk is upcoming and I’m sweating it. I want the people at my talk to get something significant out of it and not walk away feeling something was missing or it was a waste of time. When I finally made this statement to myself I realized something significant:

It’s not procrastination – it’s a failure to start.

I didn’t dive into the demo project for the talk because I felt like an imposter. How could I give a talk about a topic I am not an expert in? The reality is I needed to dive into code to incrementally learn the topic better to give people a leg up on their first try at RxSwift. This fear of being an imposter kept making me lose focus on simple things and putting them off.

I seem to have an enhanced behavior of finding something else to do instead of the “real work” when I encounter mental resistance. Mental resistance can come from not knowing a subject or the task feeling remedial. I tend to find other things to do instead like opening up a Facebook tab or checking the 14 different Slack instances I’m in for new messages. I know it is time to step back and re-center myself when I notice that my brain starts derailing like this.

When you find yourself slipping on a task or unable to commit to get something done I suggest doing the following:

  • Break the task down into smaller bits and just get started on the first one. Just get started.
  • Walk away. Literally – walk. Exercise is my number one tool to combat attention and focus issues. Grab your headphones and take a short walk around your office or neighborhood. Don’t actively try to think about your problem at hand – just take in the different atmosphere. You’ll be surprised how often an idea comes to you seemingly randomly during this process.
  • Prevent the distraction by blocking the thing you’re using as a mental crutch. In my case it was logging out of Facebook and blocking the site on my machine. The behavior broke after several months on my work computer. If it’s something like wandering and cleaning your house, close your office door and leave a note to yourself to focus. Maybe try the Pomodoro Technique for 20 minute focus sessions.
  • If all else fails stop committing to things you can’t get done. You’re not a failure if you don’t have time or interest. Dig deep in your head to see what’s important to you and your future.

Sometimes we don’t have a choice and we just have to buckle down and get something done. Reward yourself. Check off that box and celebrate! Sometimes the little successes are more important than the big ones.

Marking Unread in Slack

We’ve been using Slack at Automattic for about two years now. One of the biggest challenges I had with it (and any other chat system really) is losing my place. I will frequently read activity in a room, quickly determine it is not immediately relevant, and tell myself to not forget to come back to it later. In reality I never remember and the idea is lost to the ether of my ADHD brain.

Slack has a feature to handle this issue – you can mark a room unread at any position in history!

2015-12-17_20-49-40.png

Hover over any message, click the ellipsis (…), and click Mark unread.

Yay!

SourceTree – Delete Multiple Branches at One Time

Do you use SourceTree to help manage your Git repos? Ever work on a bunch of pull requests and have a lot of local branches you need to delete? I found a way to delete multiple branches at one time.

  1. Click Repository then click Branch.
    2015-12-08_16-24-19
  2. Click Delete Branches.
    2015-12-08_16-23-22
  3. Select the branch(es) you want to delete. Be sure not to select other than Local branches unless that’s your intention.


Changing the volume on a USB Headset on Mac OS X

Do you use a USB headset for video/audio conferencing on your Mac? Ever been frustrated that you can’t really change the volume of just the headset if you keep your main audio coming through your speakers? There is a solution – use the Audio MIDI Setup app nestled in Applications/Utilities.

2015-12-07_14-04-30.png

  1. Look for the device that matches your USB device – sometimes it only shows the manufacturer of the USB to Analog converter if its a cheapie device.
  2. Look for the “out” device if you’re looking at changing what you hear, the “in” device for your microphone audio level.
  3. Slide the master control to the right if its available. If master isn’t selectable, slide the individual left/right channels. The individual channels don’t stop at any specific points along the line so you might want to manually match up the dB (gain) value so each ear is an identical volume level.

Biggest Lie To Your ADHD Self

Most of my journey the past couple of years with coping with attention problems is increasing my self-awareness. I am my own obstacle and I must hack my own consciousness to work the way I need it to.

It’s easy to slip into old habits and totally forget the tools you’ve put in place. All it takes is one of those well-known “ooh shiny” moments and you’re off track for an hour reading about nuclear testing instead of solving the problem for work.

One of the tools I use is keeping a log of things I’ve accomplished in the day/week. The log gives me a complete picture of what I’ve been able to focus on and lets me easily reflect on the past week. I tend to find the holes this way – places I’ve let tasks slip through. This seems to work much like the effect looking at photographs lets you recall and retain memories. The problem I have is I don’t remember to write things in the log all the time. Then I forget about the log.

I’ve discovered one of the biggest lies I keep telling myself even with all of these tools and practices. What is that lie?

I’ll get to it [the task] in a few minutes.

Yeah, it never happens. Ever. I always forget or something more important on the signal to noise ratio scale eclipses it. My goal is to stop letting this little lie derail me. If the task takes a few moments to complete, DO IT NOW.

Is your Apple Watch Digital Crown sticking?

I noticed a couple days ago that the Digital Crown on my Apple Watch wasn’t turning quite as easily as it had when I got it. Of course I immediately thought it was a defect since it visually looked clean. Turns out it was needing a bit of maintenance. 

I use a treadmill desk and even with the 3mph speed I sweat a bit. The Watch was designed to handle fitness scenarios but apparently it can get gunked up without some maintenance. Simply wiping down the exterior is not enough. 

Apple has realized this too. They even published a support document specifically about the Digital Crown and their recommended process to remedy it:

https://support.apple.com/en-us/ht204639

It was a little unnerving putting the Watch under running water, but it worked. Now you know. 

Recording Your iOS Device with QuickTime Player

The Task

You need to record your iPhone or iPad’s screen to show someone a bug or demo a feature to your customers. In the past the only method available was to use a program like Reflector to emulate an AirPlay/Apple TV and then record on your machine. This works fairly decently although the quality over WiFi isn’t very good leaving you with a less-than-crisp recording. Reflector also isn’t free which makes it difficult for users in the wild to record bugs.

Enter iOS 8 & Yosemite

Apple introduced the ability to record the screens of iOS 8 devices with QuickTime Player in Mac OS X Yosemite. You may have already been familiar with the ability to do a screen recording with QuickTime but now those screens includes any of the iOS 8 devices you have connected with a cable. The implications of this new feature include:

  • High quality video recording – the video is going over the wire instead of WiFi
  • Capture audio from the device or your computer
  • Easy access to QuickTime’s built-in exporting tools
  • No new software to install – Yosemite and iOS 8 are the only requirement

The Steps

  1. Connect your iOS 8 device to your Mac OS X Yosemite (10.10) computer with the USB to lightning or dock connector cable.
  2. Launch QuickTime Player (inside of /Applications in Finder).
  3. Click Done on the file browser window that appears by default when QuickTime launches.
  4. Click File > New Movie Recording. A window will appear typically picking your built-in FaceTime camera by default. Smile.
    QuickTime File New Recording
  5. Click the little arrow next to the red recording button.
    QuickTime Recording Inputs
  6. Under Camera select the iOS device you wish to record.
  7. Your iOS device’s screen should appear on your Mac.
  8. Optionally select your device under Microphone as well if you want to record the audio from the device rather than your computer’s microphone.
  9. Click the red record button when you want to record, clicking it again when you’re done.
  10. Export the video under File > Export picking an appropriate resolution.

Notice that Apple took the time to replace your device’s status bar with one being carrier-free and fixed at 9:41am.

QuickTime Sanitized Status Bar

Nice touch.

Limitations

There are only a couple limitations that I’ve found so far. Finger tips are not shown in the video, so it can be hard to demonstrate things. My suggestion is to talk through the issue or provide a list of things you tapped if its not obvious. Secondly if you’re trying to demonstrate something that involves going full screen (like watching a video on the phone) then the recording will not capture the full screen presentation (it’ll go black). Lastly there is a little bit of lag when you’re recording so make sure to watch the actual device screen and not your computer. If you record audio from your microphone, QuickTime does a good job syncing it up afterwards. This process also works a bit better on newer devices.

Next Steps

Sharing the video you’ve recorded can be a challenge since these videos tend to be of a very very large size in a matter of seconds. Exporting in 480p can definitely help. If you’re providing a demonstration of a bug then you may wish to clip the beginning and end of the movie to only show the actual reproduction of the bug. Follow Apple’s instructions on how to clip a video here.

Reflector is still a great program and very useful. Simple things like being able to add a fake iPhone or iPad frame around the video makes a big difference for demo purposes. I will still continue to use Reflector especially since it’s still the only way to record iOS 7 devices.

Page 1 of 2

Powered by WordPress & Theme by Anders Norén